A footer content appears after the content at the very bottom of every web page. Once you install and start using WordPress, you will observe a default footer appearing on every new website. In addition, it also contains a text written: “proudly powered by WordPress,” which may seem unprofessional to your readers.
Therefore, you must want a customized footer for all the web pages of your website. If you are wondering how to edit the footer in WordPress, here are some methods of customization. These customizations will help you create a well-designed and professional-looking footer.
Scroll through the article to find them out.
How To Edit The Footer In WordPress With 5 Easy Methods
Removing the default text “proudly powered by WordPress” and customizing the WordPress footer is rightful for every website owner. Now that you are relieved about the legal aspects check out these 6 methods on how to edit the footer in WordPress.
Method 1: How To Remove “Powered By WordPress”

When you start using WordPress, you may notice a default footer text “proudly powered by WordPress” in many WordPress themes. You must edit your website’s footer to remove this text.
Some themes involve the steps on how to edit the footer in WordPress as follows:
Step 1:
Sign in to the WordPress dashboard of your site.
Step 2:
Go to the “Appearance.”
Step 3:
Hover to the “theme editor” and click on it.
Step 4:
You will find the footer.php where you need to search for the text “proudly powered by WordPress.”
Step 5:
Once you find the text, remove and update the file.
Method 2: How To Edit The Copyright Footer In WordPress

You can also find the different steps in some themes where PHP coding is not required to edit the copyright footer. So, if you are thinking of how to edit a footer in WordPress for other themes, check the following steps:
Step 1:
Go to the “Appearance” on your WordPress site.
Step 3:
Then find out the option “customize.”
Step 4:
After that, you will have to click on the “Footer” or some similar option to this.
Step 5:
After that, you will find out the “copyright” button where you can remove and replace the text.
Step 6:
Once you have removed the default text or replaced it, do not forget to update it.
Method 3: How To Add Widget To The WordPress Footer

You can find widgets in some WordPress themes to customize specific features such as the footer. Follow the steps below to edit the footer widget in WordPress.
Step 1:
Go to the “Appearance” section.
Step 2:
Then, find the option “widget.”
Step 3:
Then, you will see the “Footer” widget section on the right side of the panel.
Step 4:
You can customize this widget and click on “save.”
Method 4: How To Customize Footer For Other Pages

Many businesses make use of landing pages to drive traffic and generate leads and sales. These are not identical to other web pages as it has a set goal. Thus, you can create different WordPress footers for different pages like landing, home, 404 error page, etc.
You can use WordPress plugins that help in page building. Check out the steps below if you are thinking about how to edit footer in WordPress for other pages.
Step 1:
Once you build a page, click on “start editing the page.”
Step 2:
Then, select any element on the page and find out “Footer” in the left panel.
Step 3:
Here you can customize your footer and save it for different pages.
Method 5: How To Edit Footer In WordPress Elementor

You can use the WordPress Elementor plugin to customize your footer. Check the steps below to know how to edit a footer in WordPress.
Step 1:
Install the plugin and activate it.
Step 2:
Click on the “appearance.”
Step 3:
Then, find out the option of “Header Footer Builder” on the left of your WordPress dashboard.
Step 4:
Customize your footer and header from this plugin and save it.
Method 6: How To Edit Header And Footer In WordPress Through Themes

If you are thinking about how to edit the header and footer in WordPress, the best answer is to do it with a WordPress plugin. Check out the steps below if you are wondering how to edit the footer in WordPress through themes:
Step 1:
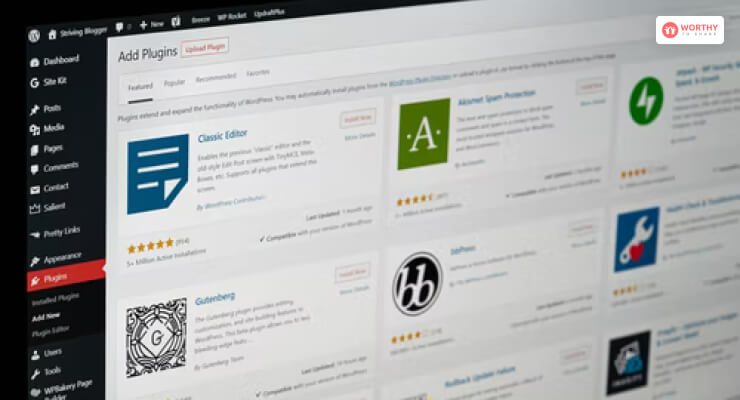
Visit the “Plugins” section and click on add new.”
Step 2:
Then, go to the HFCM tab to add or customize the code to your website footer and header.
Step 3:
To add a new code or script, click on the “Add New Snippet” option.
Step 4:
Determine if you want the code in your header or footer by going to the “location” option.
Step 5:
If you want your code to load in a certain manner, customize it from the “site display option.”
Frequently Asked Questions
There are a few themes that are compatible with the WordPress Elemntor. Those themes are Astra, Genesis, GeneratePress, Neve, Phlox, Attesa, Hestia, and OceanWP.
You can use the WordPress plugin “Remove Footer Credit” to remove and change the default text “proudly powered by WordPress.” This plugin allows you to remove this text without involving any PHP coding.
Visit the option “appearance” and choose the menu “customize.” Then, find out the Footer tab and click on the “Footer styles.” Finally, change the value in the “Widget Area Columns” option and publish it to change the WordPress Footer Columns number.
Wrapping It Up
No matter how insignificant your website’s footer may seem, this tiny matter is vital for your site’s design and professionalism. Therefore, every website owner must know to customize and edit the footer and header of a WordPress website.
These are the simple ways that can answer your question on how to edit the footer in WordPress. Following the steps mentioned above will help you build a desirable footer for your website.
So, share these words with others and keep reading our other content if your find this one helpful.
Read More:
How To Use Gamecube Controller On PC?


